Creative Outdoor Games for Kids of All Ages

Creative Outdoor Games for Kids of All Ages

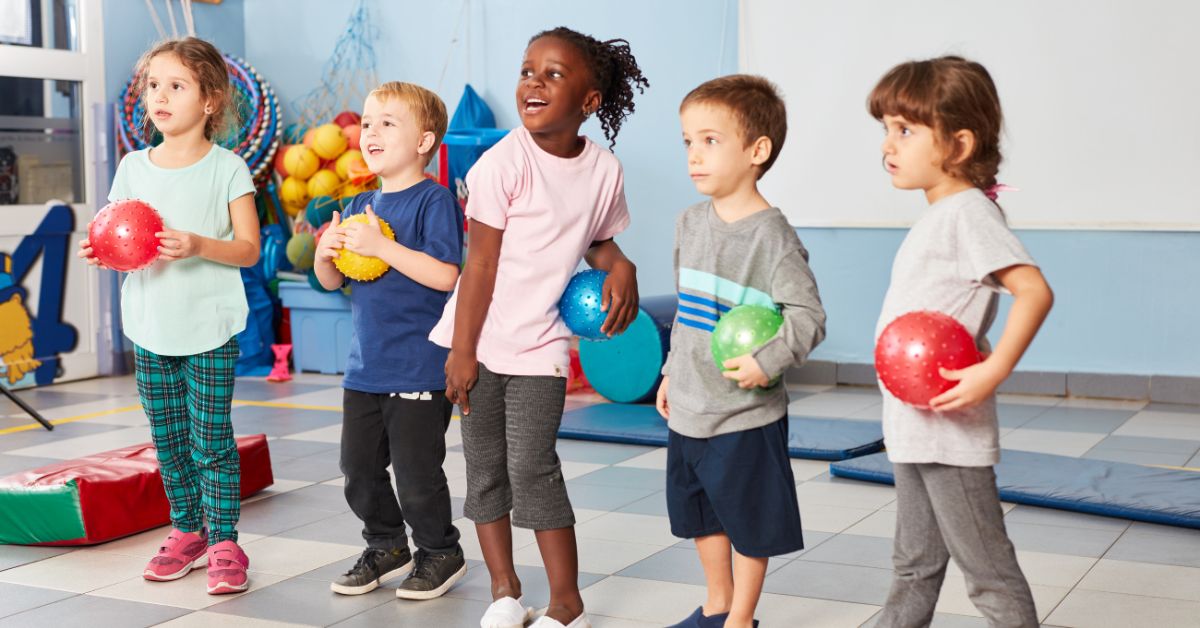
Outdoor games are essential for kids. They promote physical activity and social skills.

Finding the perfect game for every age group can be a challenge. Kids today are often glued to screens, but the right outdoor game can draw them outside. Fresh air, sunshine, and playtime are crucial for their development. Outdoor games can be simple and still be incredibly fun.

Whether you have toddlers or teenagers, there are games suitable for everyone. From imaginative play to competitive sports, there’s something for every child. It’s about fun, laughter, and making memories. Outdoor games can bring families and friends together. Ready to explore some creative ideas? Let’s dive into a world of outdoor fun for kids of all ages.

Creative Outdoor Games for Kids of All Ages

Credit: www.amazon.com

Classic Outdoor Games

When it comes to creating lasting memories and encouraging physical activity among kids, nothing beats the charm of classic outdoor games. These timeless activities not only offer endless fun but also help in developing important skills like coordination, teamwork, and strategic thinking. Let’s dive into a couple of these beloved games that have stood the test of time: Tag Variations and Hopscotch Fun.

Tag Variations

Tag is a game that has been enjoyed by generations. It’s simple yet incredibly versatile. There are countless variations to keep the excitement fresh:

  • Freeze Tag: In this version, when a player is tagged, they must freeze in place. They can only be unfrozen if another player touches them. This adds an element of strategy as players work together to unfreeze their friends.
  • Shadow Tag: Perfect for sunny days, in this game, players tag each other’s shadows instead of their bodies. It’s a great way to make use of the weather and adds a unique twist to the traditional game.
  • Blob Tag: When someone is tagged, they join hands with the tagger, forming a “blob.” The blob grows bigger with each new player tagged, creating a fun and challenging dynamic as the blob moves together.

Have you ever tried playing tag with a twist? Next time, challenge your kids with one of these variations and watch them strategize and collaborate in ways they hadn’t before.

Hopscotch Fun

Hopscotch is another classic game that requires minimal setup but offers maximum fun. All you need is a piece of chalk and a flat surface to draw the hopscotch grid.

  1. Traditional Hopscotch: Draw a grid with numbered squares. Players throw a small object, such as a stone, onto the grid and hop through the squares to retrieve it, skipping the square where the object landed. It’s an excellent way to enhance balance and coordination.
  2. Alphabet Hopscotch: Instead of numbers, use letters. Kids can hop through the alphabet while calling out each letter. This variation is not only fun but educational, helping younger children learn their ABCs.
  3. Math Hopscotch: Incorporate simple math problems into the grid. For example, players can solve an equation before hopping to the answer. It turns a fun game into a learning activity, reinforcing math skills in a playful manner.

Hopscotch is more than just a game; it’s a tool for learning and development. Have you considered using it to teach your kids something new? Whether it’s numbers, letters, or math, hopscotch can be adapted to suit various educational purposes.

Classic outdoor games are not just about physical activity; they foster creativity, learning, and social skills. Next time you step outside, why not introduce your kids to these timeless games? It could be the start of new traditions and unforgettable moments.

Creative Outdoor Games for Kids of All Ages

Credit: www.amazon.com

Nature-inspired Activities

Spending time outdoors is a fantastic way for kids to learn, explore, and have fun. Nature-inspired activities are perfect for engaging children of all ages, fostering their creativity, and encouraging them to appreciate the world around them. These activities provide a great opportunity to bond with your kids while enjoying the fresh air and beautiful scenery. Below are some exciting nature-inspired activities that your children will love.

Scavenger Hunts

Scavenger hunts are a wonderful way to turn a simple walk in the park into an adventure. Create a list of items for your kids to find, such as specific leaves, rocks, or flowers. You can tailor the list according to the season or location, making each hunt unique.

  • Spring: Look for blooming flowers, insects, and bird nests.
  • Summer: Search for butterflies, unique rocks, and different types of trees.
  • Fall: Find colorful leaves, acorns, and squirrels.
  • Winter: Spot evergreen trees, animal tracks, and pinecones.

My kids love the thrill of finding each item on the list. It keeps them engaged and active, and they learn to observe the details in nature. What items would you include in your scavenger hunt?

Garden Explorations

Gardens offer endless opportunities for discovery. Whether you have a garden at home or visit a public one, your kids can learn about different plants, insects, and ecosystems.

  1. Identify various plants: Teach your children the names and characteristics of different plants.
  2. Observe insects: Encourage them to watch bees, butterflies, and other insects at work.
  3. Planting: Let them plant seeds and watch them grow, fostering a sense of responsibility.
  4. Watering: Involve them in watering plants, teaching them about the importance of hydration.

My daughter once found a caterpillar on a leaf, and we spent an afternoon researching what kind of butterfly it would become. It was a memorable experience that sparked her interest in nature. What amazing discoveries have your kids made in the garden?

Nature-inspired activities not only entertain children but also educate them about the environment. By incorporating scavenger hunts and garden explorations into your routine, you can create lasting memories and instill a love for nature in your kids. Try these activities and watch your children’s curiosity and enthusiasm for the outdoors grow!

Diy Outdoor Challenges

Creating outdoor challenges for kids can be a fun and engaging way to keep them active. DIY outdoor challenges can be tailored to fit any age group. They spark creativity and encourage teamwork. Below, we explore two exciting DIY outdoor challenge ideas that will keep kids entertained for hours.

Obstacle Courses

Obstacle courses are a fantastic way to get kids moving. You can create a simple course using items you already have. Think hula hoops, cones, and ropes. Set up a path that kids must follow. Add activities like crawling under a rope or jumping over cones. This keeps them active and builds coordination.

Make it more fun by timing their runs. Challenge kids to beat their best time. This adds a competitive edge. It encourages them to push their limits. Obstacle courses are versatile. You can adjust the difficulty to suit different age groups. This ensures that every child is engaged and challenged.

Crafty Competitions

Crafty competitions combine creativity with physical activity. One idea is a scavenger hunt. Give kids a list of items to find. These could be leaves, rocks, or sticks. The first one to find all items wins. This keeps kids moving and thinking.

Another idea is a DIY racecar competition. Let kids build cars from cardboard boxes. Then, have a race to see whose car is the fastest. This activity encourages creativity and teamwork. It also provides a sense of accomplishment. Kids love seeing their creations come to life in a fun race.

These crafty competitions are easy to set up. They require minimal supplies. They offer endless fun and learning opportunities for kids of all ages.

Creative Outdoor Games for Kids of All Ages

Credit: www.seattleschild.com

Frequently Asked Questions

What Are Good Outdoor Games For Kids?

Good outdoor games for kids include tag, hide and seek, soccer, hopscotch, and relay races. They promote physical activity and social interaction.

What Are Some Fun Outdoor Activities For Youth?

Youth can enjoy hiking, biking, playing sports, and camping. Try geocaching, swimming, or flying kites. Organize a scavenger hunt or have a picnic.

What Are 5 Outdoor Games?

Five popular outdoor games are soccer, basketball, tennis, badminton, and frisbee. They promote physical activity and teamwork.

What Games Do Children Play Outdoor?

Children play outdoor games like tag, hide and seek, soccer, basketball, hopscotch, and jump rope. They also enjoy biking, skating, and playing on playgrounds. These activities promote physical health and social skills.

Conclusion

Outdoor games provide endless fun and creativity for kids of all ages. They encourage physical activity and teamwork. Children can explore, imagine, and bond with friends and family. Fresh air and sunshine boost their health and happiness. Simple games can create lasting memories.

So, gather some supplies and enjoy these activities. Kids will love them, and parents will too. Playing outside is a great way to spend quality time together. Don’t miss out on these enjoyable moments. Happy playing!


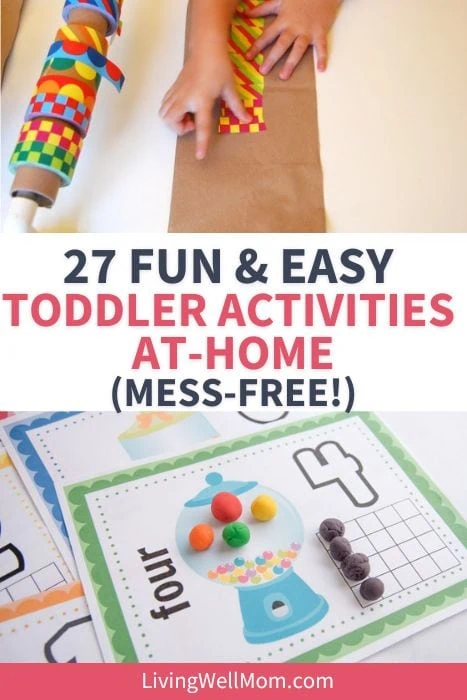
Easy and Mess-Free Crafts for Toddlers

Easy And Mess-Free Crafts for Toddlers

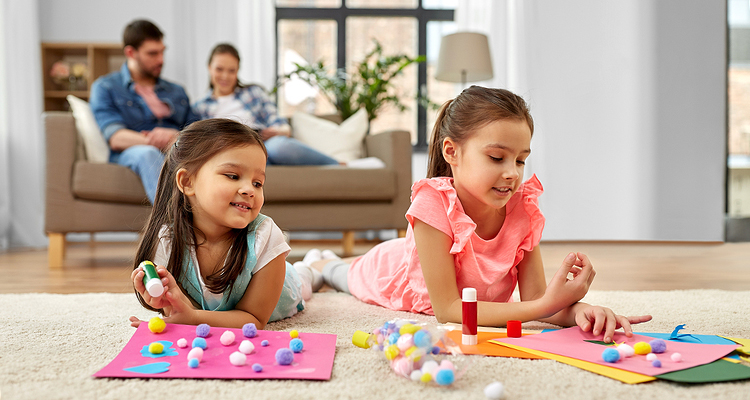
Craft time with toddlers can be fun but often messy. Imagine a crafting session that’s easy and mess-free.

Welcome to our guide on easy and mess-free crafts for toddlers! Crafting is a wonderful way to engage young minds and foster creativity. But, the thought of cleaning up after a crafting session can be daunting. This blog aims to bring you ideas that are simple to execute and leave minimal mess behind.

From paper crafts to simple painting techniques, these activities are designed to keep your little ones entertained without turning your home into a disaster zone. Let’s dive into the world of mess-free crafting and make creativity fun for both you and your toddler!

Easy And Mess-Free Crafts for Toddlers

Credit: www.pinterest.com

Simple Paper Crafts

Create easy and mess-free crafts for toddlers using simple paper supplies. Engage young minds with fun, creative activities. Enjoy bonding time without the hassle of extensive clean-up.

### Simple Paper Crafts Crafting with toddlers can be a delightful and educational experience. However, it often comes with a lot of mess. Luckily, simple paper crafts offer a fantastic solution. They are easy to make, require minimal supplies, and keep the mess to a minimum. Let’s dive into two fun and engaging paper crafts you can enjoy with your little ones. ###

Paper Plate Animals

Creating paper plate animals is a fun way to spark your toddler’s imagination. All you need are paper plates, some markers, glue, and a few bits of construction paper. – Start with the basics: Give your toddler a paper plate and let them choose an animal to create. – Add features: Use markers to draw eyes, a nose, and a mouth. – Enhance with details: Cut out ears, whiskers, or wings from construction paper and glue them onto the plate. You can make a lion by gluing strips of orange paper around the edge of the plate for a mane. Or create a fish by cutting out fins and a tail. The possibilities are endless, and the clean-up is a breeze. ###

Handprint Art

Handprint art is a simple yet highly personal craft. It captures a moment in time, making it a perfect keepsake. – Prepare your materials: You’ll need some colored paper, non-toxic paint, and a brush. – Paint their hand: Apply a thin layer of paint to your toddler’s hand. – Press and create: Gently press their hand onto the paper to create a print. Once the handprint has dried, you can transform it into various shapes or characters. For example, a handprint can become a turkey for Thanksgiving by adding a beak and feathers. A green handprint can be turned into a Christmas tree with a few drawn-on ornaments. These activities are not just fun but also help your toddler develop fine motor skills. Plus, the final products make great gifts for family members. Are you ready to start crafting with your toddler? What animal or handprint creation will you try first?
Easy And Mess-Free Crafts for Toddlers

Credit: activelittles.com

No-mess Painting

Create easy and mess-free crafts for toddlers with no-mess painting techniques. Keep your space clean while kids have fun. Enjoy a stress-free crafting experience for both parents and children.

No-Mess Painting When it comes to crafting with toddlers, the words “easy” and “mess-free” are music to a parent’s ears. No-mess painting offers a creative outlet without the chaos of spills and stains. Imagine a crafting session where you don’t have to scrub the floor afterward. Sounds perfect, right? Let’s dive into some engaging and clean painting activities that will keep your little ones entertained and your home spotless.

Water Painting

Water painting is a fantastic way to introduce your toddler to the joys of painting without any mess. All you need is a bowl of water, some brushes, and a surface that changes color when wet, like a chalkboard or concrete patio. Here’s how it works: – Materials: Bowl of water, paintbrushes, chalkboard, or concrete surface – Steps: – Fill a bowl with water. – Let your child dip the brush into the water. – Encourage them to “paint” on the surface. Watch as your toddler’s eyes light up when they see the magical transformation. The water darkens the surface, giving the illusion of paint. It’s fascinating and completely mess-free. Plus, it’s a great way to keep them cool on a hot day.

Sticker Art

Sticker art is another brilliant no-mess craft that toddlers love. Stickers are colorful, versatile, and easy for little hands to manipulate. You can create beautiful artwork without a single drop of paint. Here’s a simple method: – Materials: Various stickers, paper, and imagination – Steps: – Provide your child with a sheet of paper. – Offer a variety of stickers – shapes, animals, letters, etc. – Let them create their masterpiece by sticking the stickers onto the paper. You can even turn it into an educational activity. Ask your child to create a story with the stickers. For example, if they use animal stickers, encourage them to narrate a jungle adventure. This enhances their creativity and storytelling skills. Do you remember the joy of peeling off stickers and sticking them everywhere as a child? Relive those moments with your toddler, and watch their creativity blossom. These no-mess painting activities are perfect for fostering your toddler’s creativity without the hassle of cleaning up afterward. So, next time you’re planning a crafting session, consider these easy and mess-free options. Which one will you try first? Happy crafting!

Edible Crafts

Crafting with toddlers can be messy. Edible crafts are a great solution. They are fun, safe, and easy to clean up. Toddlers love eating their creations. Let’s explore some delicious and simple edible crafts.

Fruit Kabobs

Fruit kabobs are healthy and colorful. Start with different fruits like grapes, strawberries, and bananas. Cut them into bite-sized pieces. Let your toddler slide the fruit onto wooden skewers. They can create patterns with the colors. Enjoy the tasty and nutritious snack together.

Decorating Cookies

Decorating cookies is a delightful activity. Begin with plain cookies. Use ready-made ones or bake them together. Provide different toppings like sprinkles, chocolate chips, and icing. Let your toddler decorate the cookies. They can use their creativity and imagination. Once done, enjoy the sweet treats.

Easy And Mess-Free Crafts for Toddlers

Credit: livingwellmom.com

Frequently Asked Questions

What Is A Non Messy Craft For A 2 Year Old?

Sticker art is a non-messy craft for 2-year-olds. It’s fun, easy, and improves fine motor skills.

What Kind Of Crafts Can A 2 Year Old Do?

Two-year-olds can enjoy finger painting, simple gluing projects, playdough creations, sticker art, and coloring with jumbo crayons. These activities enhance fine motor skills and creativity.

What Is The Best Art For A 2 Year Old?

The best art for a 2-year-old includes finger painting, coloring with crayons, and using playdough. These activities boost creativity and motor skills.

What Is Open-ended Art For Toddlers?

Open-ended art for toddlers involves creative activities without specific instructions. It encourages exploration, imagination, and self-expression. This type of art fosters creativity and motor skills.

Conclusion

Crafts with toddlers can be fun and mess-free. These easy projects keep little ones entertained. They also help develop fine motor skills. Parents appreciate the simple cleanup. Enjoy quality time with your child. Create lasting memories together. Try these crafts today and see how much fun you can have.

Happy crafting!

How to Make Homemade Playdough (Easy Recipe)

How to Make Homemade Playdough (Easy Recipe)

Making homemade playdough is simple and fun. You need basic kitchen ingredients.

This easy recipe will save you money and give your kids endless hours of entertainment. Creating playdough at home allows you to control the ingredients, ensuring it’s safe for little hands. Store-bought versions can be expensive and contain unwanted chemicals.

By making it yourself, you can customize colors and textures to your child’s liking. This activity is perfect for rainy days or anytime you want a hands-on project. Plus, it’s a great way to engage children in sensory play, which is crucial for their development. In this guide, we’ll show you how to make homemade playdough with an easy recipe. Your kids will love the end result, and you’ll enjoy the process too.

How to Make Homemade Playdough (Easy Recipe)

Credit: www.iheartnaptime.net

Ingredients Needed

Are you ready to dive into the fun world of homemade playdough? Before you roll up your sleeves, let’s talk about the essential ingredients needed to make this colorful, squishy delight. With just a few common kitchen supplies and some optional add-ins, you’ll be creating memories that last a lifetime!

Common Kitchen Supplies

Most of the ingredients required for homemade playdough are already in your pantry. Here’s what you’ll need:

  • Flour: This is the base of your playdough. Regular all-purpose flour works perfectly.
  • Salt: Helps to preserve the dough and gives it texture.
  • Water: Necessary to mix all the dry ingredients together.
  • Vegetable Oil: Keeps the dough soft and pliable.
  • Cream of Tartar: This is the secret ingredient for super smooth playdough. It helps with elasticity and longevity.

Did you know that you can find these ingredients in almost any kitchen? I remember making playdough with my kids one rainy afternoon. We didn’t have to run to the store because everything was right there in our cabinets!

Optional Add-ins

Want to add a little extra flair to your homemade playdough? These optional add-ins can make your creation even more exciting:

  • Food Coloring: Add a few drops to create vibrant colors. Try mixing primary colors to discover new shades.
  • Glitter: Sparkle up your playdough by folding in some glitter. It’s like crafting magic!
  • Essential Oils: A few drops of lavender or peppermint can give your playdough a pleasant scent.
  • Extracts: Vanilla or almond extracts can add a touch of yumminess to the smell.

Imagine the joy on your children’s faces when they see glittery, colorful playdough that smells delightful! Have you ever tried mixing scents and colors to create a sensory masterpiece? If not, it’s time to experiment!

What creative add-ins will you try to make your playdough unique? Sometimes the simplest ingredients can lead to the most unexpected fun.

How to Make Homemade Playdough (Easy Recipe)

Credit: www.youtube.com

Step-by-step Instructions

Making homemade playdough is a fun and easy activity. Follow these simple steps for soft, colorful dough. You only need a few common ingredients. Let’s get started!

Mixing Dry Ingredients

First, gather your dry ingredients. In a large bowl, combine flour, salt, and cream of tartar. Use 2 cups of flour, 1 cup of salt, and 2 tablespoons of cream of tartar. Stir them well with a spoon until they are mixed evenly.

Adding Wet Ingredients

Next, add the wet ingredients. Pour 2 cups of water into a pot. Add 2 tablespoons of vegetable oil. If you want colored playdough, add food coloring now. Stir the mixture until the color is even.

Cooking The Dough

Finally, cook the dough. Place the pot on the stove over medium heat. Stir constantly to avoid lumps. Keep stirring until the mixture thickens and forms a ball. Remove from heat and let it cool. Once cool, knead the dough until smooth.

Now, your homemade playdough is ready for play! Store it in an airtight container to keep it fresh. Enjoy crafting and creating with your new dough.


Tips And Tricks

Making homemade playdough can be fun and rewarding. But knowing some tips and tricks can make it even better. These suggestions will help you keep your playdough fresh and exciting.

Storage Suggestions

Store your playdough in an airtight container. This keeps it soft and pliable. You can use plastic wrap to add an extra layer of protection. Avoid storing in direct sunlight. This can dry it out quickly. If your playdough starts to dry, add a few drops of water. Knead the dough to mix the water in.

Creative Variations

Try adding different colors and scents. Use food coloring to create vibrant shades. Essential oils can give your playdough a lovely fragrance. For a sparkly twist, add glitter to the mix. You can also mix in small beads or sequins for texture. Experiment with different ingredients to find what you like best.

How to Make Homemade Playdough (Easy Recipe)

Credit: triedtestedandtrue.com

Frequently Asked Questions

How To Make An Easy Playdough At Home?

Mix 1 cup flour, 1/2 cup salt, 1 tablespoon oil, and 1 cup water. Cook on medium heat, stirring constantly until it thickens. Let it cool and knead until smooth. Add food coloring for fun.

How To Make 3 Ingredient Playdough?

Mix 1 cup of cornstarch, 1/2 cup of hair conditioner, and food coloring. Knead until smooth. Enjoy!

How To Make 2 Ingredient Playdough?

Mix equal parts of cornstarch and hair conditioner. Knead until smooth. Your 2 ingredient playdough is ready!

How To Make Playdough With 5 Ingredients?

Mix 2 cups of flour, 1 cup of salt, 1 cup of water, 1 tablespoon of oil, and food coloring. Knead until smooth.

Conclusion

Creating homemade playdough is simple and fun for everyone. The ingredients are easy to find. The process is quick. Kids will enjoy making and playing with it. Plus, it’s safe and non-toxic. You can customize it with colors and scents.

It’s a great way to spend quality time with family. Try this easy recipe today. You’ll love the results! Homemade playdough brings joy and creativity. Enjoy making memories with your children. Happy crafting!

How to Plan a Backyard Scavenger Hunt

How to Plan a Backyard Scavenger Hunt

Planning a backyard scavenger hunt is a fun and exciting way to entertain kids and adults alike. It encourages creativity, teamwork, and a sense of adventure.

Imagine the thrill of searching for hidden treasures right in your backyard. A scavenger hunt offers a perfect blend of outdoor activity and mental challenge. You don’t need a vast space or expensive supplies to create a memorable experience. With a bit of planning and creativity, you can craft an engaging scavenger hunt that will captivate participants.

Whether it’s a birthday party, a family gathering, or just a sunny afternoon, a backyard scavenger hunt can bring joy and excitement to everyone involved. Ready to start planning? Let’s dive into the steps to make your scavenger hunt unforgettable.

How to Plan a Backyard Scavenger Hunt

Credit: www.parents.com

Choosing A Theme

Choosing a theme for your backyard scavenger hunt is crucial. The theme sets the tone and makes the hunt more exciting. It helps guide the clues and items to be found. A good theme can make the event memorable.

Popular Themes

Popular themes for a backyard scavenger hunt include nature exploration. Kids love searching for leaves, rocks, and insects. Another favorite is a pirate treasure hunt. Hide “treasures” around the yard and let the kids dress as pirates. Mystery themes are also engaging. Create clues to solve a mystery, like finding a “lost” pet or hidden object.

Age-appropriate Ideas

For younger children, simple themes work best. Consider a color hunt where they find items of a certain color. Animal hunts are fun too. They can search for toy animals hidden around the yard. Older kids enjoy more complex themes. A detective hunt with puzzles to solve can be exciting. They might also enjoy a historical theme, finding items related to a particular era.

How to Plan a Backyard Scavenger Hunt

Credit: www.parents.com

Creating Clues

Planning a backyard scavenger hunt involves creating fun clues. Hide small items and provide simple hints for each location. This engages kids and ensures a memorable adventure.

Creating Clues Planning a backyard scavenger hunt can be an exciting and creative process. The secret sauce lies in crafting engaging and challenging clues. Clues should be fun, solvable, and lead participants seamlessly from one spot to the next. Let’s explore some effective strategies for creating clues that will keep your participants on their toes and engaged throughout the hunt.

Riddles And Puzzles

Riddles and puzzles add a layer of intrigue to your scavenger hunt. They challenge the mind and create a sense of accomplishment when solved. Think about using riddles that are age-appropriate and relevant to your backyard environment. For instance, “I have a bark but do not bite, I stand tall in sunlight and give you shade at night. What am I?” This riddle leads to a tree, a common backyard element. Puzzles can range from simple word scrambles to more complex crosswords, depending on the age and skill level of your participants. If you have a younger crowd, simple rhyming riddles might work best. For older participants, you can incorporate more challenging brain teasers. Providing a mix of easy and hard riddles keeps the game balanced and fun for everyone.

Using Visual Aids

Visual aids can make your scavenger hunt more engaging and accessible, especially for younger participants or those who enjoy visual learning. Consider using: – Photos: A close-up shot of a specific part of an object can be a clue. For example, a zoomed-in image of a flower’s petal can lead participants to the garden. – Maps: Create a simple map of your backyard with marked locations. Participants can follow the map to find their next clue. – Drawings: Hand-drawn sketches of landmarks in your backyard can be a fun and creative way to point participants in the right direction. Incorporating visual aids can break up the monotony of written clues and cater to different learning styles. It also adds an element of surprise and wonder, especially if you include unexpected details in your visuals. — Think back to a time when you had to solve a puzzle or riddle. How did it make you feel when you finally figured it out? This is the feeling you want to evoke in your scavenger hunt participants. Are there any unique features in your backyard that you could incorporate into your clues? Maybe a quirky garden gnome or a distinctive rock formation? Using elements that are unique to your space adds a personal touch and enhances the experience. Remember, the goal is to create an adventure that is as enjoyable as it is challenging. By mixing riddles and visual aids, you ensure that every participant has a moment to shine. Happy hunting!

Setting Up The Hunt

Organize a fun backyard scavenger hunt by planning clues and hiding spots. Ensure each clue leads to the next for an engaging adventure.

Planning a backyard scavenger hunt can be a fun and memorable experience for both kids and adults. Whether it’s for a birthday party, family gathering, or just a weekend activity, setting up the hunt is crucial for ensuring everyone has a great time. In this section, we’ll dive into the nitty-gritty of setting up your scavenger hunt, focusing on hiding spots and safety tips.

Hiding Spots

Choosing the right hiding spots is key to making your scavenger hunt exciting and challenging. You want to strike a balance between easy and hard-to-find spots to keep participants engaged. Here are some tips:
  • Vary the difficulty: Hide some items in plain sight for younger participants and others in more challenging spots for older kids or adults.
  • Use natural features: Trees, bushes, and garden decorations make great hiding places. A rock garden or flower bed can add an extra layer of fun.
  • Think vertically: Don’t limit yourself to ground-level hiding spots. Use tree branches, fence posts, and even hanging baskets.
  • Be creative: Hide clues inside everyday items like empty pots, under garden gnomes, or inside a birdhouse.
I once hid a clue inside a hollow garden statue, and it was hilarious watching the kids try to figure out where it was. Their excitement was palpable when they finally discovered it!

Safety Tips

While the goal is to have fun, safety should always be a priority. Here are some safety tips to keep in mind:
  • Inspect the area: Before the hunt, check your backyard for potential hazards like sharp objects, uneven ground, or toxic plants.
  • Set boundaries: Clearly define the area where the hunt will take place. Use flags, cones, or rope to mark off-limits areas.
  • Supervise: Ensure there are enough adults to supervise the children, especially if the group is large. Assign specific areas to each adult to keep track of participants.
  • First aid: Have a first aid kit on hand for minor scrapes or injuries. It’s better to be prepared.
Do you remember the last time you played a game and got hurt because no one checked the area? It’s an easy step to skip, but it can make all the difference. By thoughtfully planning your hiding spots and prioritizing safety, you can create an unforgettable backyard scavenger hunt that everyone will enjoy. What unique hiding spots have you used or discovered in past hunts?
How to Plan a Backyard Scavenger Hunt

Credit: www.pinterest.com

Frequently Asked Questions

How To Organize An Outdoor Scavenger Hunt?

Plan clues, set boundaries, and create teams. Choose a theme and gather necessary materials. Ensure safety and have fun!

How To Do A Backyard Scavenger Hunt?

Plan the route and create a list of items to find. Hide the items around the backyard. Give participants the list and set a time limit. Provide clues if necessary. Reward the winners with small prizes.

What Are Good Clues For An Outdoor Scavenger Hunt?

Good clues for an outdoor scavenger hunt include finding a red flower, a round stone, a pinecone, or a bird feather.

How Do You Format A Scavenger Hunt?

To format a scavenger hunt, first create a list of items or tasks. Next, set clear rules and boundaries. Design clues or maps to guide participants. Ensure tasks are varied and engaging. Finally, determine the prize for the winner.

Conclusion

A backyard scavenger hunt brings joy and excitement. Kids and adults both love it. Planning is simple and fun. Set clear rules and pick interesting items. Create a map or list for guidance. Ensure everyone knows the boundaries. Offer small prizes to make it thrilling.

Safety should always come first. Enjoy the time spent together. Make memories that last. A backyard scavenger hunt is a perfect way to bond. Happy hunting!


Educational Activities to Keep Kids Busy After School

Educational Activities to Keep Kids Busy After School

Kids often need activities to keep them engaged after school. Educational activities are a great way to make use of this time.

Children have a lot of energy and curiosity. After school, they need activities to channel this energy positively. Educational activities can help. They make learning fun and keep kids busy. These activities can range from simple science experiments to creative arts and crafts.

They not only keep children entertained but also stimulate their minds. Such activities help in developing various skills. They can improve problem-solving, critical thinking, and creativity. Parents can easily incorporate these activities at home. Keeping kids engaged with educational tasks ensures productive use of their time. It also fosters a love for learning outside the classroom.

Educational Activities to Keep Kids Busy After School

Credit: www.coursestorm.com

Creative Arts And Crafts

After a busy day at school, kids need activities that can keep them engaged while also fostering their creativity and learning. One of the best ways to achieve this is through Creative Arts and Crafts. These activities not only provide a fun outlet but also help children develop fine motor skills, enhance their imagination, and boost their confidence. Let’s delve into some exciting and practical projects you can introduce to your children.

Painting Projects

Painting is a fantastic way for kids to express themselves. You don’t need to be a professional artist to enjoy it. Set up a small painting station with brushes, paints, and paper. Let your kids explore different techniques like:

  • Watercolor Painting: This is great for beginners. The fluidity of watercolors allows kids to experiment with blending colors.
  • Acrylic Pouring: This technique involves pouring acrylic paint onto a canvas to create beautiful, abstract designs. It’s messy but incredibly fun.
  • Finger Painting: Perfect for younger children. It’s tactile and allows them to connect directly with their art.

Once, my daughter painted an entire scene using just her fingers. The joy on her face was priceless, and the artwork was surprisingly beautiful. It made me realize how important it is to let kids explore their creativity without boundaries.

Diy Crafts

DIY crafts are another excellent way to keep your kids busy and productive. These projects can be as simple or complex as you like, depending on your child’s age and interests. Here are some ideas to get you started:

  1. Popsicle Stick Houses: Gather popsicle sticks, glue, and paint. Your kids can build miniature houses and decorate them.
  2. Beaded Jewelry: Get some beads and strings. Kids can create their own necklaces, bracelets, and even rings.
  3. Paper Mache: Using newspaper and glue, kids can craft masks, bowls, or even sculptures. It’s a great activity that also teaches patience and perseverance.

One rainy afternoon, we decided to make popsicle stick houses. It started as a simple project but turned into a whole village with roads and trees. The kids were so engrossed and proud of their creation. It was a wonderful bonding experience.

How do you keep your kids creatively engaged after school? Have you tried any painting or DIY crafts? Share your experiences in the comments below!

Educational Activities to Keep Kids Busy After School

Credit: kidsrkids.com

Outdoor Adventures

Outdoor adventures are a fantastic way to keep kids engaged after school while fostering their love for nature, physical activity, and exploration. These activities not only provide a healthy break from screens but also offer children the chance to learn new skills, build resilience, and create lasting memories. Below, we delve into some exciting outdoor adventures that your kids will love.

Nature Walks

Nature walks are an excellent way to combine physical exercise with education. You can turn a simple walk into an adventure by exploring local parks, trails, or even your neighborhood. Encourage your kids to observe their surroundings and ask questions about what they see. You can make it even more engaging by creating a scavenger hunt list of items to find, such as specific types of leaves, rocks, or insects.

Pro Tip: Bring along a small notebook and some crayons for leaf rubbings or to sketch interesting finds. This not only keeps them engaged but also sparks creativity.

Have you ever noticed how kids light up when they discover something new? Imagine the excitement in their eyes when they spot a rare bird or identify a unique plant. These moments are priceless and can turn into wonderful learning opportunities.

Sports And Games

Sports and games are another fantastic way to keep kids active and entertained after school. Whether it’s a game of soccer in the backyard, a round of tag, or a friendly match of basketball at the local court, these activities promote teamwork, coordination, and healthy competition.

Organize a mini-tournament with their friends or family members. You can even mix things up by introducing less common sports like frisbee, badminton, or even a simple relay race. The variety will keep things fresh and exciting for your kids.

Did You Know? Regular physical activity helps improve concentration and academic performance in children. So, the more they play, the better they may do in school!

What sports or games does your child enjoy the most? Try incorporating those into their after-school routine. You might be surprised at how eager they are to participate and how much fun they have.

Engaging your kids in outdoor adventures not only keeps them busy but also instills a sense of wonder and appreciation for the world around them. So, lace up those sneakers, grab a water bottle, and head outside for some post-school fun!

Science And Technology

When it comes to keeping kids engaged after school, science and technology activities offer endless possibilities. These activities not only spark curiosity but also lay a strong foundation for future learning. Plus, they are fun! Let’s dive into some practical ways to keep your kids busy with science and technology.

Simple Experiments

Simple experiments are a fantastic way to get kids excited about science. They don’t require a lot of materials, and the results are often immediate. One of my favorite experiments involves baking soda and vinegar. It’s a classic, but it never gets old. The fizzing reaction always brings a smile to kids’ faces.

Another easy experiment is making a homemade volcano. You can use simple items like clay, baking soda, and vinegar. Watching the “lava” flow out is both educational and thrilling. It’s a great way to teach kids about chemical reactions in a hands-on way.

How about turning milk into plastic? Yes, it’s possible! By mixing milk and vinegar, you can create a fun, moldable substance. This experiment demonstrates how chemical reactions can create new materials. It’s a perfect blend of learning and play.

Coding For Kids

Coding is another excellent way to keep kids occupied after school. It’s not just for adults; kids can learn to code too. There are numerous online platforms designed specifically for young minds. Scratch, for instance, is a fantastic tool that uses a visual programming language. Kids can create their own games and animations, making learning to code incredibly fun.

Robotics kits are also a great way to introduce coding. Kits like LEGO Mindstorms or Ozobot allow kids to build and program their own robots. These activities improve problem-solving skills and encourage creativity. Plus, kids love the hands-on experience of building something that moves.

Have you ever thought about app development for kids? It’s easier than you might think. Tools like MIT App Inventor provide a user-friendly interface for kids to create their own apps. Imagine the pride on their faces when they show off an app they developed themselves!

What kind of technology activities does your child enjoy? Try a few and see which ones capture their interest. The key is to make learning a thrilling adventure.

Educational Activities to Keep Kids Busy After School

Credit: www.facebook.com

Frequently Asked Questions

How Do I Keep My Child Entertained After School?

Engage your child with creative activities like drawing, reading, or playing educational games. Encourage outdoor play and sports. Organize playdates or family time. Introduce hobbies like music or cooking. Set a consistent routine.

What Are Some After School Activities For Kids?

Kids can enjoy sports, arts and crafts, music lessons, dance classes, swimming, drama clubs, and academic tutoring after school.

What Is The Best Routine For Kids After School?

The best routine for kids after school includes a healthy snack, homework, outdoor play, and family time. Consistency is key.

What Should A 7 Year Old Be Doing After School?

A 7-year-old should engage in homework, playtime, reading, and hobbies. Encourage outdoor activities and social interaction for balanced growth.

Conclusion

Keeping kids engaged after school is essential for their growth. Educational activities provide fun ways to learn. They help children develop new skills. Arts, crafts, and reading can be great options. Outdoor play and science experiments also keep their minds active.

These activities ensure they stay productive and happy. Parents can mix different activities to keep things exciting. Try incorporating these ideas into your routine. Your kids will benefit greatly.


DIY Holiday Ornaments

Diy Holiday Ornaments: Fun Craft Ideas for Kids

Looking for a fun holiday activity for kids? DIY holiday ornaments are perfect!

They combine creativity with festive spirit and are easy to make. Crafting holiday ornaments is a wonderful way to engage children. It encourages their imagination and fine motor skills. Plus, it brings families together for quality time. From paper stars to glittery baubles, kids can make a variety of decorations.

These crafts are simple and use common materials found at home. So, gather your supplies and let the crafting begin. Not only will your kids enjoy it, but your tree will also look beautiful and unique. Ready to start? Keep reading for some fun and easy ideas that will make your holidays extra special.

Diy Holiday Ornaments: Fun Craft Ideas for Kids

Credit: www.acraftylife.com

Creative Ornament Ideas

Are you looking for creative ways to make your holiday season extra special this year? Crafting DIY holiday ornaments with your kids is a fantastic way to create lasting memories and beautiful decorations. Plus, it’s a great way to keep little hands busy and fuel their creativity. Below, you’ll find some fun and easy ornament ideas that will delight both children and adults.

Paper Snowflakes

Paper snowflakes are a timeless craft that never goes out of style. They are simple to make and can be a great opportunity to teach your kids about symmetry and patterns.

  • Materials: All you need is paper and scissors.
  • Instructions: Fold a square piece of paper several times and then cut out shapes along the edges. When you unfold it, you’ll have a unique snowflake!
  • Personal Tip: When I was a child, my mom and I would hang our paper snowflakes on the windows to create a winter wonderland effect. You can do the same and even add glitter for extra sparkle.

Salt Dough Ornaments

Salt dough ornaments are another fantastic option. They are fun to make and can be personalized in countless ways.

  • Materials: You’ll need flour, salt, water, and cookie cutters.
  • Instructions: Mix the ingredients to form a dough, roll it out, and use cookie cutters to create shapes. Bake them at a low temperature until they’re hard, then paint and decorate as you like.
  • Personal Tip: Last year, my kids made salt dough ornaments and painted them with their favorite colors. We even used some as gift tags for presents. It was a hit with the whole family!

Making your own ornaments can be a wonderful way to spend time together and create something beautiful. Plus, it’s a great chance to teach your kids new skills and encourage their creativity. Have you ever tried making DIY ornaments? What was your favorite project?

Diy Holiday Ornaments: Fun Craft Ideas for Kids

Credit: www.youtube.com

Kid-friendly Materials

Creating DIY holiday ornaments with kids is a wonderful way to spend quality time together. Using kid-friendly materials ensures their safety and makes crafting fun for everyone. Here are some excellent materials to use.

Non-toxic Paints

Non-toxic paints are a must for kids’ crafts. These paints are safe for little hands and easy to clean up. Choose vibrant colors to make the ornaments stand out. Look for labels that say “non-toxic” to ensure safety.

Water-based paints are a great choice. They dry quickly and have minimal odor. Kids can use brushes or sponges to apply the paint. Let their creativity shine through with different painting techniques.

Soft Felt Fabrics

Soft felt fabrics are perfect for making ornaments. Felt is easy to cut and sew, making it ideal for little crafters. Choose a variety of colors to create fun and festive designs.

Felt is also durable and can be decorated with fabric glue or simple stitching. Kids can use felt to make shapes like stars, trees, and snowflakes. Adding buttons or sequins can give the ornaments extra sparkle.

Crafting Tips

Create joyful memories with DIY holiday ornaments. Kids will love crafting their own festive decorations. Fun and easy ideas await!

When it comes to creating DIY holiday ornaments with your kids, the experience can be both fun and rewarding. However, a few thoughtful crafting tips can transform potential chaos into a smooth and enjoyable activity. From ensuring easy cleanup to setting supervision guidelines, these tips will help you and your children make beautiful memories and ornaments.

Easy Cleanup

Crafting can get messy, but cleanup doesn’t have to be a nightmare. Preparation is key. Before you start, cover your workspace with old newspapers or a disposable tablecloth. This makes it easy to bundle up and throw away any mess once you’re done. Choose materials that are easy to manage. For instance, water-based paints and washable markers can save you from permanent stains. Keep a damp cloth or wipes nearby for quick spills. Organize supplies in advance. Use small containers or trays to keep items like beads, glitter, and glue sticks in one place. This not only helps in finding things quickly but also simplifies putting everything back once you’re finished.

Supervision Guidelines

When crafting with kids, safety is paramount. Always supervise activities that involve sharp objects like scissors or needles. You might be surprised how quickly accidents can happen, so keep a close watch. Set clear rules beforehand. Explain which tools are off-limits without adult help and demonstrate how to use them safely. For younger children, pre-cut materials can eliminate the need for sharp tools entirely. Encourage independence but be ready to step in. Allowing your child to explore their creativity is important, but don’t hesitate to assist if they seem stuck or frustrated. This balance helps build their confidence while ensuring they stay safe. Have you ever noticed how kids often come up with the most creative ideas when given the freedom to experiment? By setting clear guidelines and being present, you can foster a safe environment for their creativity to flourish. By incorporating these crafting tips, you’ll create a more enjoyable experience for both you and your kids. What are your favorite tips for a smooth crafting session? Share in the comments below!
Diy Holiday Ornaments: Fun Craft Ideas for Kids

Credit: www.notquitesusie.com

Frequently Asked Questions

What Are Some Fun Christmas Crafts For Kids?

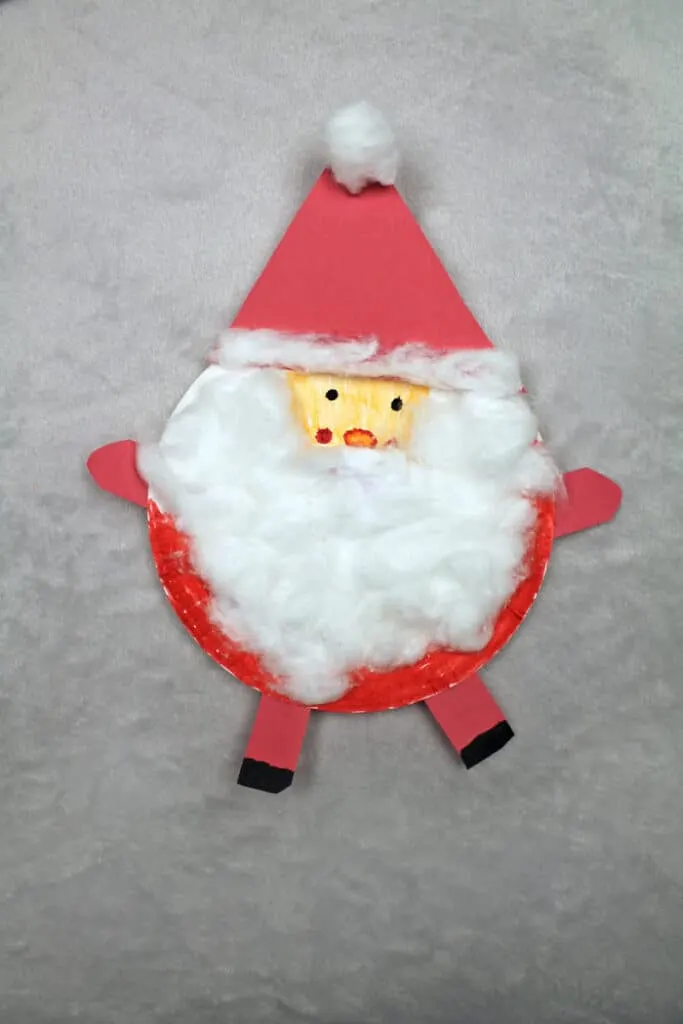
Kids can enjoy making paper snowflakes, decorating gingerbread houses, creating handprint wreaths, and crafting paper plate Santas. These activities are fun and festive. They also help improve creativity and fine motor skills.

What Can I Make Out Of Christmas Ornaments?

You can create wreaths, garlands, table centerpieces, and decorative bowls using Christmas ornaments. These items add festive charm to any space.

How To Make A Cluster Of Christmas Ornaments?

To make a cluster of Christmas ornaments, gather various sizes and colors. Attach them to a foam ball or wire. Use hot glue or string to secure each ornament. Hang your cluster using a ribbon or hook. Enjoy your festive decoration!

How To Make Hand Made Ornaments?

To make handmade ornaments, gather materials like beads, wire, and glue. Follow a simple design. Assemble pieces carefully. Let dry completely. Enjoy your unique creation.

Conclusion

Creating DIY holiday ornaments with kids is a delightful activity. It fosters creativity and provides quality family time. These simple projects also make memorable keepsakes. Kids will love seeing their creations on the tree. Plus, it’s a great way to save money on decorations.

Gather your supplies, pick a project, and start crafting today. Happy holidays and enjoy the fun!


Fun Science Experiments for Kids to Try at Home

Fun Science Experiments for Kids to Try at Home

Science can be an exciting adventure for kids. At home, it becomes even more fun and accessible.

Exploring science through hands-on experiments sparks curiosity and learning in children. These activities are not just educational but also a great way to spend quality time together. Kids get to see science in action, right in their own homes. Whether it’s watching a volcano erupt or making a simple circuit, these experiments captivate young minds.

They also teach important concepts in a playful, memorable way. Dive into the world of at-home science experiments and see your child’s interest in science grow. Get ready for some fun and discovery!

Easy Kitchen Chemistry

Exploring science at home can be fun and educational. Kitchen chemistry experiments are simple and use everyday items. These activities are perfect for kids. They teach basic scientific concepts through hands-on learning.

Baking Soda Volcano

This classic experiment is a favorite. It’s easy to set up and exciting to watch. Start by molding a volcano shape with clay or playdough. Place an empty bottle in the center. Mix baking soda, red food coloring, and dish soap in the bottle. When ready, pour vinegar into the bottle. Watch the eruption! The reaction between baking soda and vinegar creates carbon dioxide gas. This makes the volcano “erupt.”

Invisible Ink

Make secret messages with invisible ink. Use lemon juice as your ink. Dip a cotton swab in lemon juice and write on white paper. Let the paper dry completely. The writing will be invisible. To reveal the message, hold the paper near a heat source, like a light bulb or a hairdryer. The heat causes the lemon juice to oxidize and turn brown. This makes the hidden message appear.

Fun Science Experiments for Kids to Try at Home

Credit: biotium.com

Outdoor Science Adventures

Kids can enjoy fun science experiments at home with Outdoor Science Adventures. Activities include making volcanoes, creating slime, and exploring nature. These simple experiments spark curiosity and promote learning.

Exploring science in the great outdoors can be incredibly fun. Kids love hands-on activities. Outdoor experiments can spark curiosity and a love for learning. Discover nature, experiment with sunlight, and explore new ideas.

Diy Solar Oven

Create a solar oven using a pizza box. It’s simple and educational. Kids learn about solar energy. First, cut a flap in the lid of the box. Cover the flap with aluminum foil. Line the bottom of the box with black construction paper. Place plastic wrap over the opening. Now, the fun part. Put a treat inside, like s’mores. Set the box in direct sunlight. Wait and watch as the sun cooks your treat. It’s a tasty way to learn about solar power.

Nature Scavenger Hunt

A nature scavenger hunt is a great way to explore the outdoors. Make a list of items for kids to find. Examples: leaves, rocks, flowers, or insects. Give each child a bag for collecting items. Set a time limit. Then, let them search. This activity helps kids learn about their environment. They observe different plants and animals. It encourages curiosity and exploration. Plus, it’s a fun way to spend time outside. Outdoor science adventures are perfect for active learning. Children can explore, experiment, and discover. These activities are simple and engaging. Get outside and start your science adventure today! “`

Creative Physics Projects

Exploring physics can be a fun and educational experience for kids. Creative physics projects offer hands-on ways to understand the principles of motion, force, and energy. These activities can turn complex concepts into simple, enjoyable experiments that children can try at home. Let’s dive into two engaging projects: the Balloon Rocket and the Marble Run.

Balloon Rocket

Ready for some high-flying fun? A balloon rocket is an exciting way to demonstrate Newton’s third law of motion: For every action, there is an equal and opposite reaction.

  • Materials: Balloon, straw, string, tape, and scissors.
  • Steps:
    1. Thread the string through the straw.
    2. Tape one end of the string to a fixed point like a wall or a chair.
    3. Blow up the balloon but don’t tie it. Instead, tape the balloon to the straw.
    4. Pull the string tight and hold the untaped end.
    5. Release the balloon and watch it zoom along the string!

When you let go of the balloon, the air rushing out propels it forward along the string. This simple yet powerful experiment provides a clear illustration of how rockets work. What other objects can you use to create a rocket? Try experimenting with different balloon sizes or adding weights. You’ll be surprised by the results!

Marble Run

If your child loves building and problem-solving, a marble run is a perfect project. This activity demonstrates gravity, friction, and energy transfer in a playful and engaging way.

  • Materials: Marbles, cardboard tubes, tape, scissors, and a flat surface.
  • Steps:
    1. Cut the cardboard tubes into various lengths and shapes.
    2. Tape the tubes together to form a track.
    3. Create ramps, loops, and funnels to make the run more exciting.
    4. Place the marble at the top of the run and watch it go!

As the marble travels through the run, it encounters different forces and speeds. How can you make the marble go faster? What happens if you change the angle of the ramps? Encouraging kids to modify their designs helps them understand cause and effect. Plus, it’s an excellent way to foster creativity and innovation!

Which experiment will you try first? The Balloon Rocket and Marble Run are just the beginning. What other creative physics projects can you come up with? Let your imagination soar and make learning fun!

Fun Science Experiments for Kids to Try at Home

Credit: www.fantasticfunandlearning.com

Fun Science Experiments for Kids to Try at Home

Credit: ozobot.com

Frequently Asked Questions

What Is An Easy Science Experiment For Kids?

A simple science experiment for kids is the classic volcano eruption. Combine baking soda and vinegar to create a fun, fizzy reaction. This experiment is easy, safe, and demonstrates a chemical reaction.

How To Make A Science Experiment At Home?

Choose a simple experiment. Gather materials, follow instructions, and observe results. Ensure safety and adult supervision. Enjoy learning!

What Are The Simple Experiments?

Simple experiments include baking soda and vinegar volcano, growing crystals, and making a paper airplane. These are easy and fun.

What Is The Easiest Science To Do?

The easiest science to do is often considered to be biology. It involves studying living organisms and their processes, which can be more intuitive and relatable compared to other sciences.

Conclusion

Science experiments at home can be fun and educational for kids. They spark curiosity and creativity. These activities also strengthen problem-solving skills. Plus, they create cherished memories. Try some of these experiments today. Watch your child’s excitement grow. Science is a wonderful way to learn and play.

Happy experimenting!

How to Create a Kids’ Art Station at Home

How to Create a Kids’ Art Station at Home

Creating a kids’ art station at home is simple and rewarding. It sparks creativity and keeps kids engaged.

Kids love expressing themselves through art. A dedicated art station at home can provide them a space to explore their imagination. It doesn’t require a lot of space or money. With a few key supplies and a little organization, you can set up an inviting art area.

This will help foster your child’s creativity and fine motor skills. Plus, it can keep your little ones entertained for hours. In this blog post, we’ll guide you through easy steps to create a fun and functional kids’ art station at home. Get ready to see your child’s artistic side come to life!

How to Create a Kids’ Art Station at Home

Credit: www.lemonthistle.com

Choosing The Right Space

Create a kids’ art station at home by choosing a quiet, well-lit corner. Ensure the space is safe and clutter-free.

Creating a kids’ art station at home can be a delightful and rewarding experience. One of the most crucial steps in this process is choosing the right space. A well-selected area can inspire creativity and keep the mess contained. Below, we’ll dive into how you can find the ideal location and maximize the available space for your child’s artistic endeavors.

Finding An Ideal Location

When selecting the perfect spot for your kids’ art station, consider areas that are easily accessible and have good natural light. A corner in the living room, a section of the kitchen, or even a part of their bedroom could work wonders. You want a place where your child feels comfortable and can focus on their creativity. Think about your daily routine. Is there a spot where you frequently find your child doodling or crafting? That might be the ideal location for their dedicated art station. I once set up my child’s art corner in the kitchen because it allowed me to keep an eye on them while cooking. It became their favorite place to create masterpieces.

Maximizing Available Space

Even if you’re working with a small area, you can still create a functional and inspiring art station. Utilize vertical space by installing shelves to store supplies. Consider using multi-functional furniture, like a desk with drawers or a fold-out table, to keep the area organized. In tight spaces, every inch counts. Think about hanging storage solutions, like pegboards or wall-mounted baskets, which can hold brushes, markers, and other art tools. This keeps the surface free for your child to work on their projects. Have you thought about using an unused closet or a nook under the stairs? These often-overlooked areas can be transformed into a creative haven. Adding a small table, some comfy seating, and plenty of storage can turn a mundane spot into an inspiring art station. Choosing the right space for your kids’ art station involves creativity and practicality. Where do you think your child would thrive the most?
How to Create a Kids’ Art Station at Home

Credit: supermomhacks.com

Essential Supplies

Create a kids’ art station at home with essential supplies like crayons, markers, paper, and scissors. Organize materials in easy-to-reach bins. Encourage creativity and fun activities.

Creating a kids’ art station at home is a fantastic way to nurture your child’s creativity and keep their artistic supplies organized. To make this endeavor successful, it is crucial to gather the Essential Supplies that will spark your child’s imagination and ensure everything has its place. Let’s dive into the key elements you need to consider.

Basic Art Materials

Having the right materials on hand is the first step in setting up your kids’ art station. Here’s what you’ll need:
  • Drawing and Coloring Tools: Stock up on crayons, colored pencils, markers, and watercolors. These tools are the foundation of any art project.
  • Paper: Keep a variety of paper types, such as construction paper, sketch pads, and watercolor paper. Different projects require different textures and thicknesses.
  • Paints and Brushes: A set of washable paints and brushes in various sizes will encourage your child to experiment with painting.
  • Scissors and Glue: Child-safe scissors and glue sticks are essential for cutting and pasting projects.
  • Additional Supplies: Include items like stickers, stamps, and stencils to add variety and fun to your child’s art activities.
When I first set up an art station for my kids, I noticed their excitement skyrocketed simply by having a dedicated space with all these materials. It made them feel like little artists ready to create masterpieces.

Storage Solutions

Having essential supplies is just one part of the puzzle. Keeping everything organized ensures that the art station remains a place of inspiration rather than chaos. Here are some practical storage solutions:
  • Containers and Bins: Use clear plastic bins or containers to store different categories of supplies. Label each container to make it easy for your child to find what they need.
  • Art Caddies: An art caddy with compartments is perfect for holding frequently used items like crayons, markers, and scissors. It’s portable, so your child can carry it to different areas.
  • Drawer Units: A small drawer unit can be a great addition. Assign each drawer to specific items, such as paper, paint, or crafting tools.
  • Wall Organizers: Utilize wall space with hanging organizers or pegboards. These are excellent for storing tools and keeping the workspace clutter-free.
I found that involving my kids in the process of organizing their supplies made them more responsible for keeping their art station tidy. Plus, it added to the excitement of having a space they helped create. Are you ready to set up your kids’ art station at home? By focusing on essential supplies and practical storage solutions, you’ll create an inviting and organized space that fosters creativity and independence. What unique items will you include in your art station to make it special for your child?

Inspiring Creativity

Creating a kids’ art station at home can be a wonderful way to inspire creativity in your children. An art station provides a dedicated space for kids to explore their imagination. It encourages self-expression and helps develop fine motor skills. Setting up an art station can be both fun and practical.

Decorating The Art Station

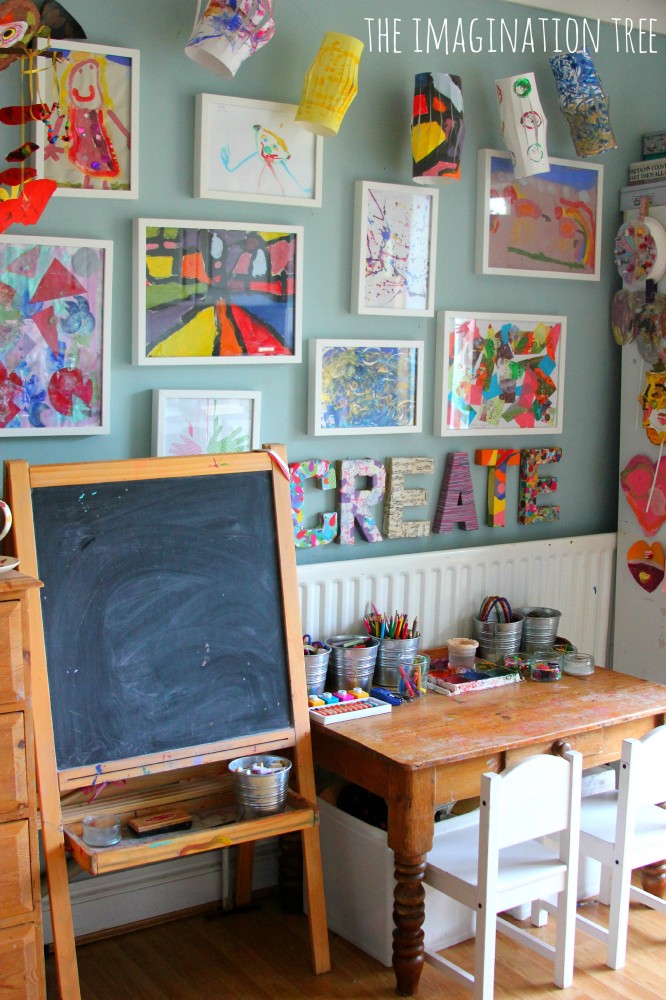
Decorating the art station can make it more inviting for your children. Choose bright, cheerful colors for the walls and furniture. Add a colorful rug to define the space. Consider using chalkboard paint on one wall. This allows kids to draw directly on the wall, adding to the fun.

Storage is important in an art station. Use bins, baskets, and shelves to keep supplies organized. Label each container with pictures or words. This helps kids find what they need easily. Include a variety of supplies like crayons, markers, paints, and paper. Rotate supplies to keep the station interesting.

Displaying Artwork

Displaying your child’s artwork can boost their confidence and sense of pride. Create a gallery wall with frames or clipboards. Change the artwork regularly to keep the display fresh. Use string and clothespins to hang drawings and paintings. This makes it easy to switch out pieces.

Consider digital displays as well. Take photos of their artwork and create a digital slideshow. Share their creations with family and friends. This also helps preserve their work. Celebrate their efforts and encourage them to keep creating.

How to Create a Kids’ Art Station at Home

Credit: theimaginationtree.com

Frequently Asked Questions

How To Set Up An Art Station For Kids?

Create an organized space with a table, chairs, and storage bins. Provide child-safe art supplies like crayons, paper, and markers. Include aprons to keep clothes clean. Display finished artwork to encourage creativity. Keep the area tidy and accessible.

How Do You Store Kids Art Supplies At Home?

Store kids’ art supplies in labeled bins, clear containers, or drawer organizers. Keep them accessible and organized on shelves.

How To Set Up A Kids Art Room?

Create a dedicated, clutter-free space with child-sized furniture. Add storage bins for supplies. Use washable materials. Display artwork to inspire creativity. Ensure good lighting and ventilation.

How Can I Display My Child’s Art At Home?

Frame the artwork and hang it on walls. Use a corkboard to display multiple pieces. Create a rotating art gallery with clipboards. Display art on a string with clothespins. Use magnetic frames on the fridge.

Conclusion

Creating a kids’ art station at home is simple and fun. Your child will love having a dedicated space to explore creativity. It encourages independence and keeps art supplies organized. Start small and build as you go. Use bright colors and easy-to-reach storage.

Include a table, chairs, and plenty of paper. Make the space welcoming and inspiring. With these tips, your child’s artistic journey will flourish. Enjoy watching their imagination come to life!