
Creating a puppet theater at home is easy and fun. Puppets can bring stories to life.
You don’t need many materials to start. Building your own DIY puppet theater is a great project for kids and adults alike. It encourages creativity and can provide hours of entertainment. Whether you’re looking to make a small puppet show for family or have a fun activity for a rainy day, this guide will help you get started.
We will walk you through the simple steps to create a puppet theater using items you already have at home. Get ready to dive into a world of imagination and storytelling with your very own homemade puppet theater!

Credit: ofthehearth.com
Materials Needed
Gather cardboard, glue, scissors, markers, and fabric for curtains. You’ll also need paint, sticks, and puppets.
Creating a DIY puppet theater at home can be a fun and rewarding project for you and your family. Before you start, gather all the materials you need to make the process smoother and more enjoyable. This guide will help you understand the basic supplies required and some optional add-ons to enhance your puppet theater.Basic Supplies
To begin, you’ll need some fundamental items. These include:- Cardboard boxes: These will form the main structure of your puppet theater. Choose sturdy boxes that are large enough to create a stage.
- Scissors or a craft knife: You’ll need these to cut out the stage opening and other components.
- Tape and glue: These will help you secure the pieces together. Strong adhesive is key to ensuring your theater stays intact.
- Markers and paint: These are for decorating your theater. Use bright colors to make it visually appealing.
- Fabric: This can be used to create curtains for your stage. Choose a fabric that is easy to handle and drapes well.
Optional Add-ons
To make your theater even more special, consider these optional add-ons:- String lights: These can add a magical touch to your puppet theater. They’re great for creating a cozy and enchanting atmosphere.
- Miniature furniture or props: Adding small props can bring your puppet shows to life. Think about items like tiny chairs, tables, or even a backdrop scene.
- Sound effects: A small Bluetooth speaker can amplify your shows with sound effects or background music. This can make your puppet theater more engaging.
- Costumes for puppets: Small pieces of fabric, buttons, and other craft supplies can be used to create outfits for your puppets. It adds another layer of fun and creativity.
Building The Theater
Create a simple DIY puppet theater at home with just a few materials. Use cardboard, fabric, and some creativity. Perfect for fun, interactive playtime with kids.
Building a puppet theater at home can be a fun and creative project for both kids and adults. You don’t need to be a master carpenter or have a lot of expensive materials. With some basic supplies and a little bit of imagination, you can create a delightful puppet theater. Let’s dive into the two main parts: constructing the frame and creating the stage.Constructing The Frame
First things first, gather your materials. You will need some wooden dowels or PVC pipes, a few screws, and a piece of fabric for the curtain. Start by making a simple rectangular frame. Connect four wooden dowels or PVC pipes in the shape of a rectangle, securing the joints with screws or pipe connectors. Ensure your frame is stable. You might want to add an extra dowel or pipe across the middle for additional support. This helps keep the structure steady during those animated puppet shows!Creating The Stage
Next, let’s create the stage. Cut a piece of fabric to fit the width of your frame. This will be your curtain. Attach the curtain to the top dowel or pipe. You can use curtain rings, clips, or simply sew a pocket at the top of the fabric and slide it onto the dowel. Set the stage by adding a small platform or table behind the curtain. This is where the puppeteers will stand. Make sure the platform is at a comfortable height for the performers. Finally, decorate your theater! Paint the frame, add some decorations, or even create a themed backdrop. This makes the puppet shows more engaging and fun. Now, you have a simple DIY puppet theater ready for endless storytelling. What kind of stories will you bring to life?Adding Finishing Touches
Complete your puppet theater with small details like curtains, painted backgrounds, and colorful decorations. These touches bring your puppet theater to life.
Adding Finishing Touches Now that the basic structure of your DIY puppet theater is complete, it’s time to add those special finishing touches. These details will bring your theater to life and make it a delightful experience for everyone involved. Let’s dive into some practical steps to add the perfect finishing touches.Decorating The Theater
Start by choosing a color scheme that excites you and your kids. You can use craft paint to add vibrant colors to the theater frame. Bright reds, blues, and yellows work well and make the theater pop. Add curtains to give it a real theater feel. You can use old fabric or even paper for this. If you have a small tension rod, it can easily hold the curtains in place. Consider adding some decorative elements like stars, moons, or even a name banner. A sign saying “Welcome to the Puppet Show” can add a personal touch. Let your kids help with the decorations—they’ll love having a hand in the creative process.Setting Up The Puppets
Make sure your puppets are easily accessible to the performers. You can create simple hand puppets using socks or paper bags. Draw faces on them and add yarn for hair. Arrange a small box or basket behind the theater to keep the puppets organized. This way, you won’t have to scramble for the right puppet during the show. Think about the storyline for your puppet show. Having a clear story will make the performance smoother and more engaging. Ask your kids what kind of stories they want to tell—it’s a great way to spark their creativity. — Have you ever made a DIY puppet theater at home? What tips would you add to make it even more special? Share your thoughts in the comments below!
Credit: ofthehearth.com
Credit: www.primarysinging.com
Frequently Asked Questions
How To Make A Small Puppet Theatre?
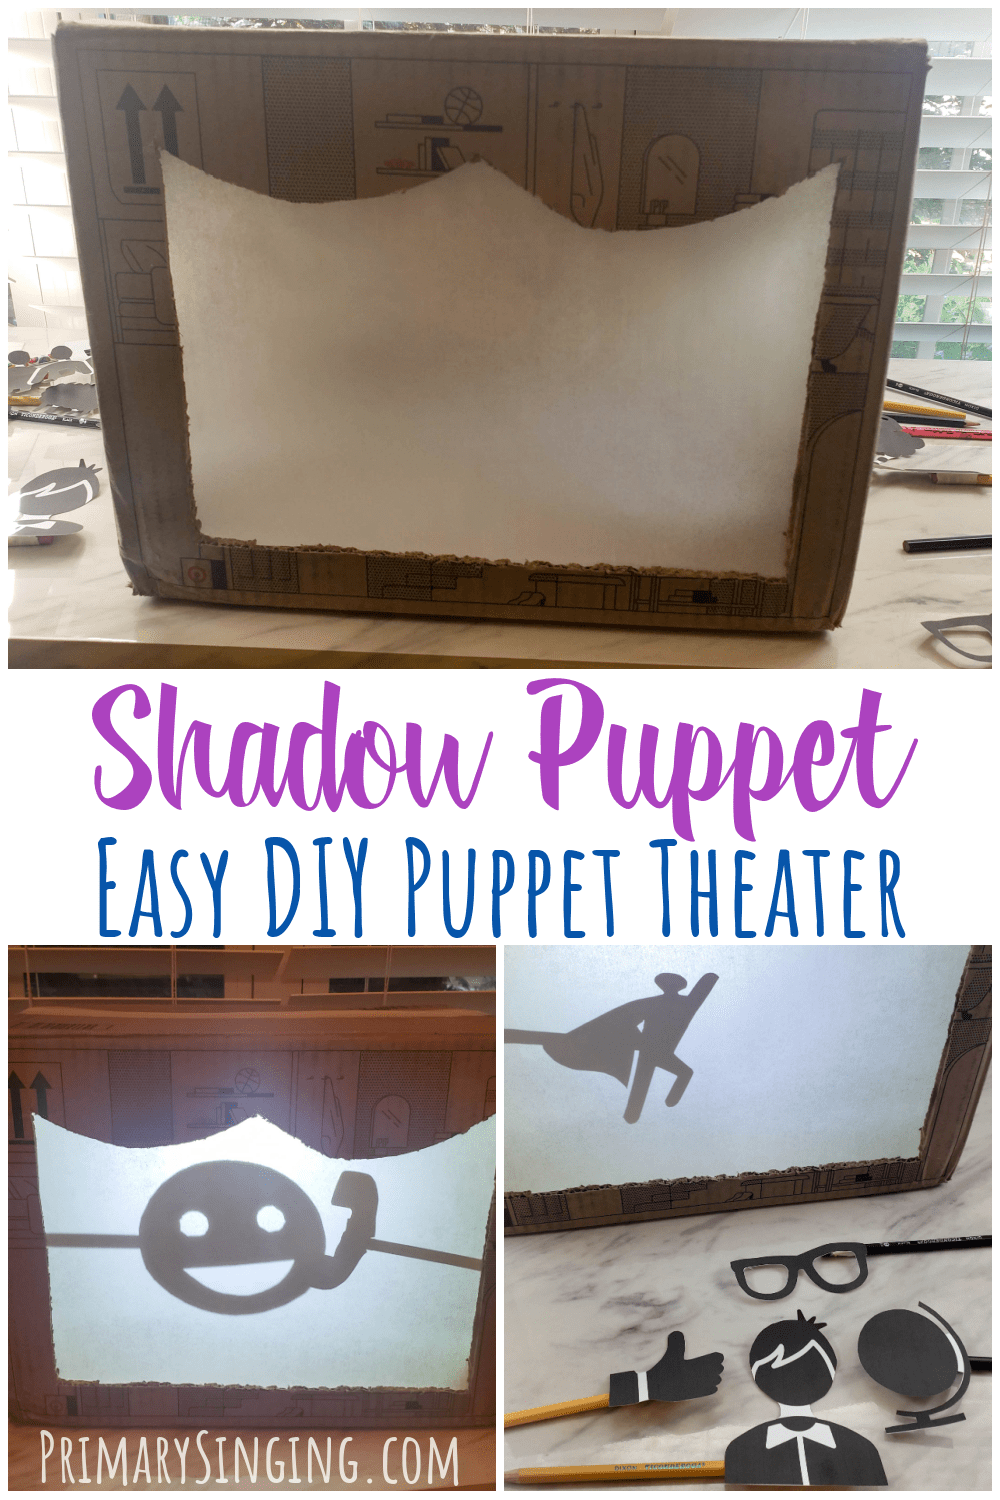
Use a cardboard box as the stage. Cut an opening for the puppet screen. Decorate with paint or fabric. Add curtains and props. Create simple puppets using socks or paper.
How To Make A Stage With Cardboard?
To make a stage with cardboard, cut and shape pieces for the base, sides, and back. Secure them with tape or glue. Decorate with paint, fabric, or paper. Add details like curtains or props. Ensure stability by reinforcing with extra cardboard layers.
How To Make A Puppet Theatre From A Shoebox?
Cut a window in the shoebox lid. Decorate the box with paint or paper. Create puppets using sticks and paper. Secure the lid upright. Perform your show.
How To Make A Home Theater Out Of Cardboard?
Create a home theater by cutting a large cardboard box to form a screen. Decorate with paint and lights. Add speakers and a tablet or phone for a screen. Use pillows and blankets for seating. Enjoy your DIY cardboard home theater!
Conclusion
Creating a simple DIY puppet theater at home is fun and easy. It brings families together and sparks creativity. Use materials you already have. Save money and enjoy quality time with your kids. Follow the steps, and you’ll have a puppet theater in no time.
It’s a great project for a rainy day or weekend. Encourage your children to put on shows and tell stories. Let their imaginations run wild. Remember, the joy is in the making and playing. Happy crafting!